Leveling Garage Floor for Living Space A Guide
Leveling a garage floor for living space is a rewarding project, transforming a utilitarian space into a comfortable living area. This guide will walk you through the entire process, from meticulous planning and assessments to final touches. We’ll cover everything from choosing the right leveling techniques to navigating electrical, plumbing, and HVAC considerations. Prepare for a journey filled with insights into interior design and safety, along with budget management and timeline estimations.
The process involves a detailed evaluation of your current garage floor, considering its structural integrity and the extent of leveling needed. Different leveling methods, materials, and their associated pros and cons will be examined. This comprehensive guide also delves into critical considerations like electrical, plumbing, and HVAC installations, safety measures, and budget planning, ensuring a smooth and successful conversion.
Project Planning and Assessment
Source: budgetdumpster.com
Getting your garage ready for living space requires careful planning. This involves a thorough assessment of the existing floor, determining the necessary repairs, and ensuring compliance with local building codes. Proper planning minimizes surprises and ensures a smooth conversion process.
A comprehensive evaluation of the garage floor’s condition is crucial for successful project execution. This step involves not just aesthetics but also ensuring the floor can safely support the intended load and function.
Evaluating the Current Garage Floor Condition
A thorough inspection of the garage floor is essential to identify existing problems. Visual inspection is the first step. Look for cracks, uneven surfaces, signs of water damage (mold, mildew, or discoloration), and areas of significant settling or sagging. These visual cues can reveal underlying issues.
Assessing Structural Integrity
Beyond visual inspection, methods like a pressure test or a load test are necessary to determine the structural integrity of the concrete floor. A pressure test involves applying pressure to different points on the floor to assess its ability to withstand the anticipated load. A load test involves placing a known weight on the floor to measure deflection and identify potential structural weaknesses.
Determining the Extent of Leveling Work
The extent of leveling work depends on the severity of the identified issues. Minor cracks or slight unevenness may only require patching and leveling compounds. Significant structural problems, like extensive cracks or significant sagging, may necessitate more extensive repairs, potentially including slab replacement. Consider the intended use and weight distribution of the space to determine the required level of reinforcement or support.
Pre-Project Preparations Checklist
This checklist will help ensure a smooth conversion process.
- Measurements: Accurately measure the garage floor dimensions, noting any irregularities. Detailed measurements are vital for material calculations and proper planning.
- Permits: Research and obtain any necessary permits and approvals from local building authorities. These regulations ensure that the project adheres to local codes and safety standards. Contact your local building department to understand the permit process and requirements for your area.
- Material Estimates: Estimate the amount of materials needed, including leveling compounds, concrete, reinforcement materials, and any additional supplies. Accurate estimates prevent cost overruns and ensure sufficient materials are on hand.
Obtaining Necessary Permits and Approvals
Obtaining the necessary permits and approvals is crucial for legal compliance and ensuring the project adheres to safety standards. The process involves submitting detailed plans and specifications to the relevant authorities. Compliance with building codes is vital for project approval.
Comparison of Garage Floor Surfaces
Different types of garage floor surfaces have varying suitability for living space conversions.
| Surface Type | Pros | Cons | Suitability for Living Space |
|---|---|---|---|
| Concrete | Durable, relatively inexpensive | Can be cold and unappealing | Good, if properly finished and insulated |
| Epoxy | Highly durable, water-resistant | More expensive, requires specialized application | Excellent for high-traffic areas, kitchens, or bathrooms |
| Tile | Aesthetically pleasing, water-resistant | Can be slippery, more expensive than concrete | Good for areas with high moisture, but consider underlayment |
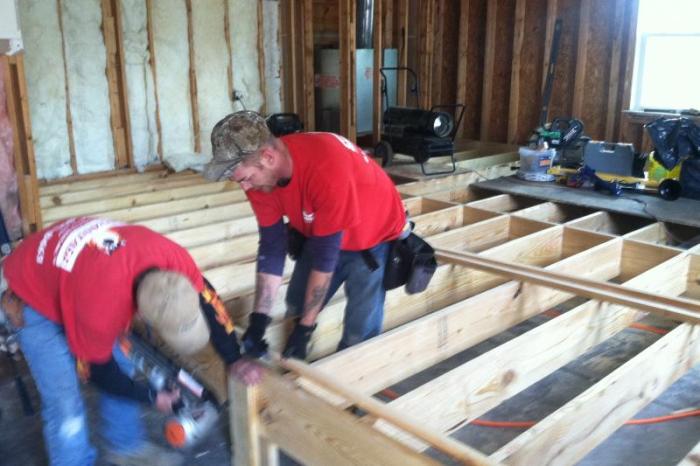
Leveling Techniques and Materials

Source: angi.com
Getting your garage floor level is crucial for a smooth, safe, and usable living space. Proper leveling ensures that your flooring materials lay flat, preventing tripping hazards and creating a more aesthetically pleasing environment. This section details the various leveling methods, their pros and cons, and the importance of proper subfloor preparation.
Leveling Methods
Different leveling techniques offer varying degrees of effectiveness, cost, and complexity. Choosing the right method depends on the extent of the unevenness, your budget, and the desired outcome. Common methods include concrete patching, self-leveling compounds, and specialized floor systems.
Concrete Patching
Concrete patching is a cost-effective method for small, localized imperfections. It involves removing damaged concrete, preparing the area, mixing and applying new concrete, and allowing it to cure. This approach is ideal for repairing cracks, holes, or small areas of unevenness. Patching is typically quicker and less expensive than other methods, but its effectiveness is limited to smaller repairs.
Self-Leveling Compounds
Self-leveling compounds are suitable for larger areas with significant unevenness. These compounds are poured onto the subfloor and spread evenly, creating a smooth, level surface. They’re excellent for filling gaps, leveling uneven concrete, and creating a uniform base for flooring materials. Their ability to cover extensive areas makes them a popular choice for garages and other large spaces.
Specialized Floor Systems
Specialized floor systems are the most robust and durable solution for extensive leveling needs or situations requiring high-impact resistance. These systems often incorporate specialized materials like epoxy or polyurethane resins, which provide exceptional strength and durability. They are typically more expensive and time-consuming to install than other methods, but they offer the longest lifespan and the highest level of structural support.
Material Comparison Table
| Leveling Material | Approximate Cost (per sq ft) | Application Time (hours per sq ft) |
|---|---|---|
| Concrete Patching | $1-$5 | 0.5-2 |
| Self-Leveling Compound | $5-$15 | 1-3 |
| Specialized Floor Systems | $15-$50+ | 3-10+ |
Note: Costs and times are approximate and can vary significantly based on the project’s specific needs.
Subfloor Preparation
Thorough subfloor preparation is critical for the success of any leveling project. A clean, level, and stable subfloor is essential for the new leveling material to adhere properly and last. This involves removing debris, repairing any existing cracks or holes, and ensuring the subfloor is adequately compacted.
Self-Leveling Compound Installation (Step-by-Step)
- Prepare the subfloor by removing loose debris and ensuring it’s clean and level.
- Apply a bonding agent to the subfloor, following the manufacturer’s instructions.
- Mix the self-leveling compound according to the manufacturer’s instructions. Ensure proper mixing to avoid lumps.
- Pour the compound onto the subfloor, spreading it evenly using a notched trowel.
- Use a straight edge to ensure a level surface.
- Allow the compound to cure according to the manufacturer’s instructions.
Durability and Lifespan
The durability and lifespan of leveling materials vary based on the type of material and the preparation of the subfloor. Concrete patching typically lasts as long as the surrounding concrete, while self-leveling compounds can last for decades with proper installation. Specialized floor systems, due to their robustness, offer the longest lifespans, often exceeding 20 years.
Surface Preparation for Leveling Materials
Surface preparation is crucial for all leveling materials. For concrete, this involves ensuring the surface is clean, free of contaminants, and adequately roughened to promote bonding. For self-leveling compounds, a clean and level subfloor is paramount. Specialized floor systems often require a specific surface profile for optimal performance.
Electrical, Plumbing, and HVAC Considerations: Leveling Garage Floor For Living Space
Converting a garage into a livable space requires careful planning for utilities. This section details the crucial electrical, plumbing, and HVAC considerations for a smooth and safe conversion. Proper installation is paramount for both functionality and safety.
Electrical systems, plumbing lines, and HVAC systems must be integrated into the new space’s design thoughtfully. This involves considering the load capacity of the existing electrical panel, the appropriate placement of fixtures, and the efficiency of the chosen HVAC system in maintaining a comfortable temperature.
Electrical Requirements
Proper electrical planning is vital for a safe and functional converted living space. This includes sufficient outlets, lighting, and wiring capacity. A thorough assessment of the existing electrical system is essential to determine if it can handle the increased load. If not, a significant upgrade is required. This involves correctly sizing the electrical panel to accommodate the new appliances and fixtures.
- Outlets: Calculate the number and type of outlets needed based on the anticipated appliances and usage patterns. Consider the use of GFCI outlets in areas with potential water exposure, like near sinks or showers.
- Lighting: Plan the placement of lighting fixtures to ensure adequate illumination in all areas. This includes task lighting, ambient lighting, and accent lighting.
- Wiring: Install new wiring as necessary to support the added electrical loads. Proper conduit sizing and electrical code compliance are critical.
Plumbing Installations
Plumbing installations are another critical aspect of the conversion. The existing plumbing system needs assessment and modification to suit the new space’s requirements. This includes installing new fixtures like sinks, toilets, and water lines.
- Sinks and Toilets: Plan the placement of sinks and toilets based on the layout. Ensure sufficient space for plumbing connections and fixtures.
- Water Lines: Install new water lines to support the new fixtures. Consider the type of water lines (copper, PVC, PEX) based on local plumbing codes and project budget.
- Drainage: Ensure the existing drainage system can handle the increased water flow from the new fixtures. This often involves checking the size and capacity of the drainpipes and ensuring proper slope.
HVAC Systems
HVAC considerations are vital for ensuring a comfortable indoor environment in the converted garage. The appropriate system should maintain temperature control in the converted living area, especially during different seasons.
- Heating: Select a heating system that meets the needs of the new living space. This may involve installing a new furnace, upgrading existing heating systems, or installing supplemental heating solutions.
- Cooling: Select a cooling system that meets the needs of the new living space. This may involve installing a new air conditioner, upgrading existing cooling systems, or installing supplemental cooling solutions.
- Ventilation: Ensure proper ventilation to remove moisture and odors. This might involve installing exhaust fans in bathrooms or kitchens or using a whole-house ventilation system.
Layout Design
Planning the layout of electrical and plumbing lines is crucial for a seamless integration into the overall design. This involves anticipating future needs and providing ample space for future expansion.
- Routing: Carefully plan the routing of electrical and plumbing lines to minimize interference with the overall design and maximize space efficiency.
- Concealment: Conceal electrical and plumbing lines within walls or floors, if possible, to improve aesthetics.
- Future-Proofing: Anticipate future needs and allow sufficient space for potential upgrades or additions.
Safety Precautions
Safety is paramount in electrical and plumbing installations. Adhering to safety regulations is crucial for both the project’s success and the user’s well-being.
- Electrical Codes: Comply with all local electrical codes and regulations. This involves hiring qualified electricians for the job.
- Plumbing Codes: Comply with all local plumbing codes and regulations. This involves hiring qualified plumbers for the job.
- Proper Grounding: Ensure all electrical systems are properly grounded to prevent electrical shocks.
- Water Leaks: Plan for potential water leaks and install proper drainage systems to prevent water damage.
Interior Design and Finishing
Transforming a garage into a livable space requires careful consideration of interior design elements. This section details crucial aspects like selecting suitable flooring, wall finishes, and lighting to create a comfortable and functional living area. Prioritizing comfort and practicality alongside aesthetic appeal is key.
Designing a Comfortable and Functional Living Space
A converted garage can be tailored to a variety of uses. For a cozy living room, consider comfortable seating arrangements and a focal point, like a fireplace or a well-placed TV. If the space is meant for a home office, ensure ample desk space and storage solutions. Adding personal touches, like artwork or plants, can personalize the space and make it feel more like home.
Flooring Options
Choosing the right flooring is crucial for both aesthetics and durability. Hardwood floors offer a classic look and can be refinished, while laminate or engineered wood provide a similar appearance with greater affordability and resistance to moisture. Vinyl or luxury vinyl tile (LVT) are great alternatives for areas with potential water exposure. Consider the level of traffic the space will see, the budget, and the overall design aesthetic when selecting flooring. For instance, a high-traffic area might benefit from the durability of LVT.
Wall and Ceiling Finishing Options
Walls and ceilings can significantly impact the ambiance of a converted garage. Paints offer a wide range of colors and finishes, allowing for customization. For a more dramatic look, consider using textured paints or wallpaper. Paneling, such as wood or faux wood, can add warmth and character. When choosing, factor in the space’s size and lighting conditions. A darker color in a smaller room might make it feel cramped.
Interior Design Style Comparison
| Style | Description | Suitable for Garage Conversion? |
|---|---|---|
| Modern | Clean lines, minimalist design, neutral colors | Yes, adaptable to various garage conversions |
| Rustic | Warm tones, natural materials (wood, stone), exposed beams | Excellent for a garage with exposed structure |
| Contemporary | Bold colors, geometric patterns, sophisticated elements | Works well if you want a unique and stylish space |
| Coastal | Light colors, natural textures, nautical elements | Suitable if you desire a calming and refreshing atmosphere |
This table offers a comparative overview of different interior design styles. Consider the overall vibe you want to create when making your selection.
Integration of Natural Light and Ventilation
Maximizing natural light and ventilation is essential for creating a welcoming and healthy environment. The strategic placement of windows and skylights can brighten the space and make it feel larger. Good ventilation prevents moisture buildup, which can damage the structure and create mold. Consider installing exhaust fans to maintain proper airflow. The integration of natural light and ventilation contributes greatly to the space’s overall comfort and health.
Minimizing Noise and Maximizing Insulation
Soundproofing and insulation are crucial for a comfortable living space. Adding sound-absorbing materials like rugs, curtains, or acoustic panels can significantly reduce noise levels. Insulation materials, like spray foam or fiberglass, will enhance thermal insulation and reduce drafts, which is crucial in converted spaces where walls might not be as well-insulated as typical living spaces. Investing in quality insulation will improve energy efficiency and reduce noise transmission.
Safety and Accessibility
Converting a garage into livable space is exciting, but safety and accessibility are paramount. Proper planning and execution are crucial to prevent accidents and ensure the converted area is usable for everyone. This section details essential safety measures and accessibility requirements to create a safe and comfortable living environment.
Ensuring the safety of everyone during construction and use is paramount. This includes understanding potential hazards, taking necessary precautions, and following established guidelines for both the building process and ongoing use of the space. ADA compliance is critical for creating an inclusive space that accommodates individuals with disabilities.
Safety Measures During Conversion, Leveling garage floor for living space
Proper safety procedures are essential throughout the entire conversion process. This includes using appropriate personal protective equipment (PPE) like safety glasses, gloves, and sturdy work boots. Proper lifting techniques and safe handling of materials are vital to prevent injuries. Be aware of potential electrical hazards, and never work with electrical systems without proper training and safety precautions. Always follow manufacturer instructions for all tools and materials.
Accessibility Requirements (ADA Compliance)
Accessibility is critical for inclusivity. ADA guidelines mandate specific features for accessible design, including ramps, wider doorways, grab bars, and lever-style door handles. These elements ensure that individuals with disabilities can navigate and utilize the space safely and independently. Consider universal design principles to make the space usable by a wide range of people, regardless of their physical abilities. Consult with a qualified architect or accessibility specialist to ensure full compliance.
Safe and Accessible Design Elements
Implementing accessible design elements in the converted space is crucial for usability. Install ramps with appropriate gradients and handrails to facilitate access to different levels. Ensure doorways are wide enough to accommodate wheelchairs and mobility devices. Install grab bars near toilets, showers, and in other high-traffic areas to support users. Choose lever-style door handles to reduce the physical effort required for opening and closing doors.
Potential Hazards and Safety Measures
Potential hazards in a converted garage include electrical issues, exposed wiring, uneven surfaces, and the presence of hazardous materials from previous garage use. Safety measures include properly installing electrical systems, ensuring adequate insulation and grounding, using non-slip flooring, and thoroughly inspecting the area for any leftover hazardous materials. Proper ventilation and fire safety are also crucial.
Ventilation and Fire Safety
Adequate ventilation is vital in the converted space. Ensure proper air circulation to prevent moisture buildup and the accumulation of harmful gases. The converted area should also comply with local fire codes, which may include installing smoke detectors, fire extinguishers, and appropriate fire-resistant materials. Consider the potential for increased heat from appliances, such as a furnace or water heater, and ensure that appropriate clearances and ventilation are in place.
Budgeting and Timeline
Figuring out the cost and how long your garage conversion will take is crucial. A well-planned budget and timeline will help you stay on track and avoid costly surprises. Understanding potential pitfalls and how to manage them is equally important. This section details the budget, timeline, and contractor comparison to ensure a smooth and successful project.
A thorough budget and realistic timeline, along with a plan to address potential cost overruns, are vital for a successful garage conversion project. Detailed cost estimates and timelines, including material costs, labor, permits, and contingency funds, are crucial.
Detailed Budget
A detailed budget is the cornerstone of any successful project. It should include an itemized list of all anticipated expenses. This includes material costs (concrete, insulation, drywall, flooring, etc.), labor costs for leveling, electrical work, plumbing, and finishing touches. Don’t forget permits, inspections, and potential unforeseen costs. Consider adding a contingency fund to account for unexpected expenses. For example, a 10% contingency is often a safe practice.
- Materials: Calculate the precise amount of materials needed for leveling, including concrete, gravel, or other necessary materials. Consider different types of insulation and their impact on the final cost.
- Labor: Estimate labor costs for leveling, electrical work, plumbing, and finishing touches. Get quotes from multiple contractors and compare their rates.
- Permits: Local building codes may require permits for the conversion. Include permit fees in your budget.
- Contingency Fund: Set aside a portion of your budget for unexpected costs, like material price increases or delays.
Timeline Estimation
A realistic timeline is just as important as a detailed budget. It should article each stage of the conversion, including the leveling process, electrical and plumbing installations, and interior finishing. Break down the project into smaller, manageable tasks. This will help you track progress and identify potential delays.
- Leveling: Estimate the time required for leveling the garage floor. This depends on the current condition of the floor and the chosen leveling method.
- Electrical/Plumbing: Determine the time needed for installing new electrical and plumbing systems. This often depends on the complexity of the work.
- Interior Finishing: Estimate the time for finishing touches like painting, flooring installation, and installing cabinets.
- Permitting and Inspections: Factor in the time required for obtaining necessary permits and undergoing inspections.
Potential Cost Overruns
Unexpected costs are a common occurrence in any construction project.
Anticipating potential cost overruns and developing strategies to mitigate them is essential. Examples include unexpected material shortages, unforeseen structural issues, or delays in obtaining permits. Communicate clearly with your contractors and have a plan for handling price fluctuations.
- Material Shortages: Investigate potential material shortages and have alternative materials readily available.
- Unforeseen Issues: Conduct thorough inspections before starting the project to identify potential structural issues.
- Permit Delays: Be aware of potential delays in obtaining permits and build contingency time into the schedule.
Contractor Comparison
Comparing contractors and their associated costs can help you make an informed decision. Use a table to list different contractors, their quoted prices, their experience levels, and any guarantees.
| Contractor | Quoted Price | Experience | Guarantees |
|---|---|---|---|
| ABC Construction | $15,000 | 10+ years | Full warranty on labor |
| XYZ Builders | $18,000 | 5+ years | Partial warranty on materials |
| Local Handyman | $12,000 | 3+ years | No specific guarantees |
Ending Remarks
Source: storyblok.com
In conclusion, converting your garage into a living space is a significant undertaking that demands careful planning, execution, and attention to detail. This guide has covered all the essential aspects, from initial assessments and leveling techniques to final interior design and safety considerations. By following the steps in Artikeld, you can transform your garage into a functional and comfortable living space while understanding the practicalities of budgeting and timelines. Remember to prioritize safety throughout the process and consult professionals when needed. Good luck with your project!